I was tempted many times to re-design that power supply. I just kept worrying that whatever was loading down that supply would just give me the same problems. I needed to know that it wasn’t an issue with the synth itself.
Provided your AC is good, you shouldn’t have an issue. If anything, a larger transformer ought to do the trick. Something that puts out a higher voltage at the secondary.
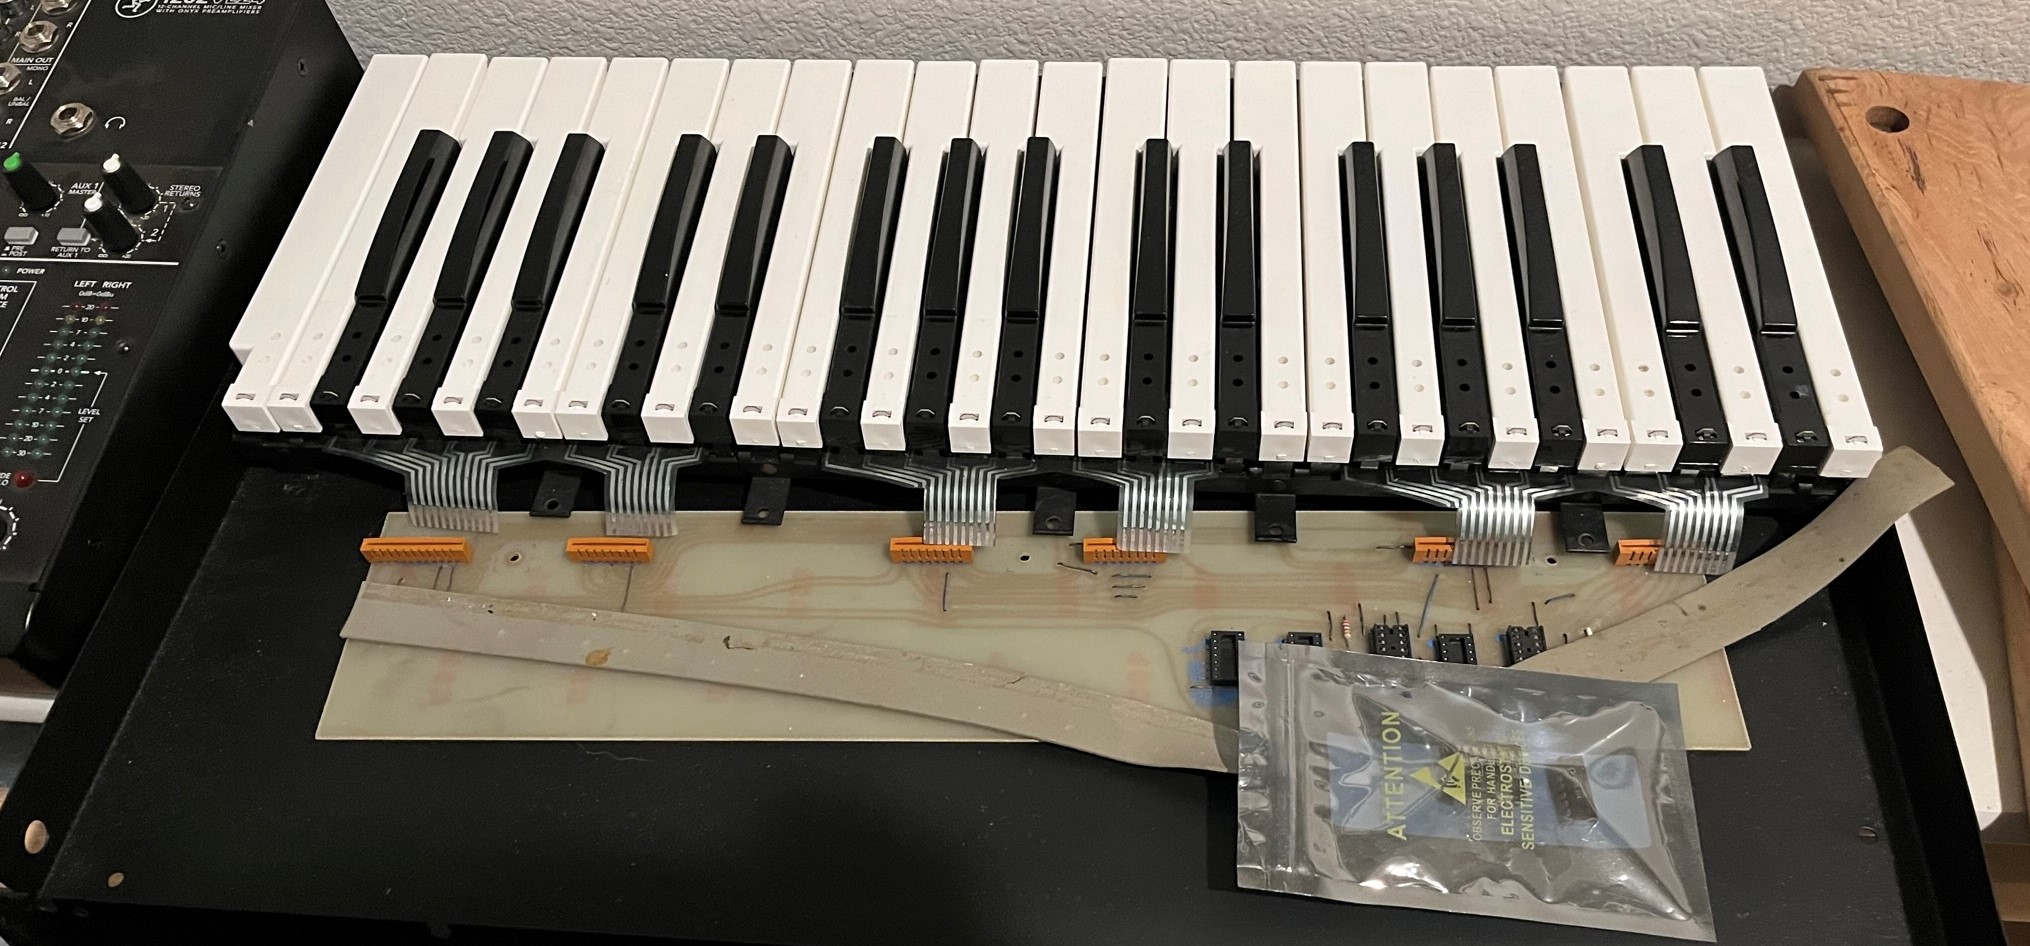
I’m down to fighting with that keybed. I have no problems with the lowest C, for instance, but the C one octave up will quit. No difference if I swap them. I’ve pulled off all of the keys and it seems to work if I press down on that rubber pad or the contacts beneath. Near as I can figure, there’s something wrong with that pad. The key presses down into that pad, but it doesn’t spring back right away. I’m trying to think of a replacement or something I can put on top of it.
(Slipped a thin piece stiff paper under the post. Didn’t even have to glue it - it’s that tight. Seems to work so far, but the action is a little bit stiffer compared to other keys. Not a proper repair, but I think I’m on the right track…)
Syntaur lists the keys. You might be able to get a replacement if the epoxy doesn’t work
I have been working on some other keyboards, like the DX7 and some of the Rolands, and it seems to me that it would be possible to retrofit one of their keybeds into the Proteus. They’re built better, and the action on them is good. No need for bushings, either.
The trick would be in getting one that you can modify the current matrix to use the same keyscan circuit. The Yamaha DX7 keybeds look more mechanical with an actual contactor making contact between two poles, while the DX27 uses a resistive contact over 8 keys.
The Roland keybeds (so far) use the typical resistive buttons which could be re-wired.
In addition to this, some of these keybeds are using an aftertouch strip that may be useful… I’m thinking it might be possible to wire one of them into the modulation circuitry.
Speaking of keyboards, I’ve got mine done. I painted the frame; the thickness of the paint caused the key bushings to bind. I cleaned the paint off and filed off just a bit more to get it all to play nice. Now the keyboard is perfect.
That looks nice. You have more patience than I do…
I see the foam rubber strip lying across the board. Did you find a replacement for it?
There are a few threads regarding keyboard grease. What I have now works, but the action still feels a bit slow compared to other keyboards. I’ve got a tube of the CAIG DeoxIT L260-DN1 coming from Amazon to try.
I found gorilla double sided tape that was a little thicker. I peeled once side to stick it to the switch contacts and left the other side on. It seems to be about right. I still need to test that it’s working as I expect. But still, worst case is I use the old foam rubber strip.
I am using Lucas Oil White Lithium Grease. I read (somewhere) that Lithium grease was a good lubricant for a keyboard. It seems to be working good for me.
That will be interesting to see. I first tried to use a piece of electrician’s tape for a shim, but it was so thick that it was like holding the key down. The paper was just thick enough to make a difference without being too thin. Amazing how little tolerance there seems to be.
I picked up a tube of the Lucas Oil White Lithium Grease. I was a bit hesitant after the experience I had before, but I found a forum where people were using it to lubricate computer keyboards. There is definitely a difference in white lithium grease between manufacturers! The Lucas Oil grease has a very thin consistency, were the Permatex grease I used before thickened up and became sticky.
I’ll probably re-grease my keybed even though it’s working okay now. I don’t think there’s any issue with the vaseline I used, but I don’t know what that will do to the bushings. Probably too late for that…
I think if I did it all over again, I’d be thinking about that idea of replacing the keyboard. After playing with some of the Roland and Yamaha keyboards, the keys on the Proteus feel like a Casio toy. My Behringer Deepmind isn’t much better. It’s amazing how much difference there is.