The Ax-7 had a minor accident - plaguing keytar is a contact sport after all.
Forgive my serious lack of experience in repairing, so my attempt to explain may be a bit off but here it is
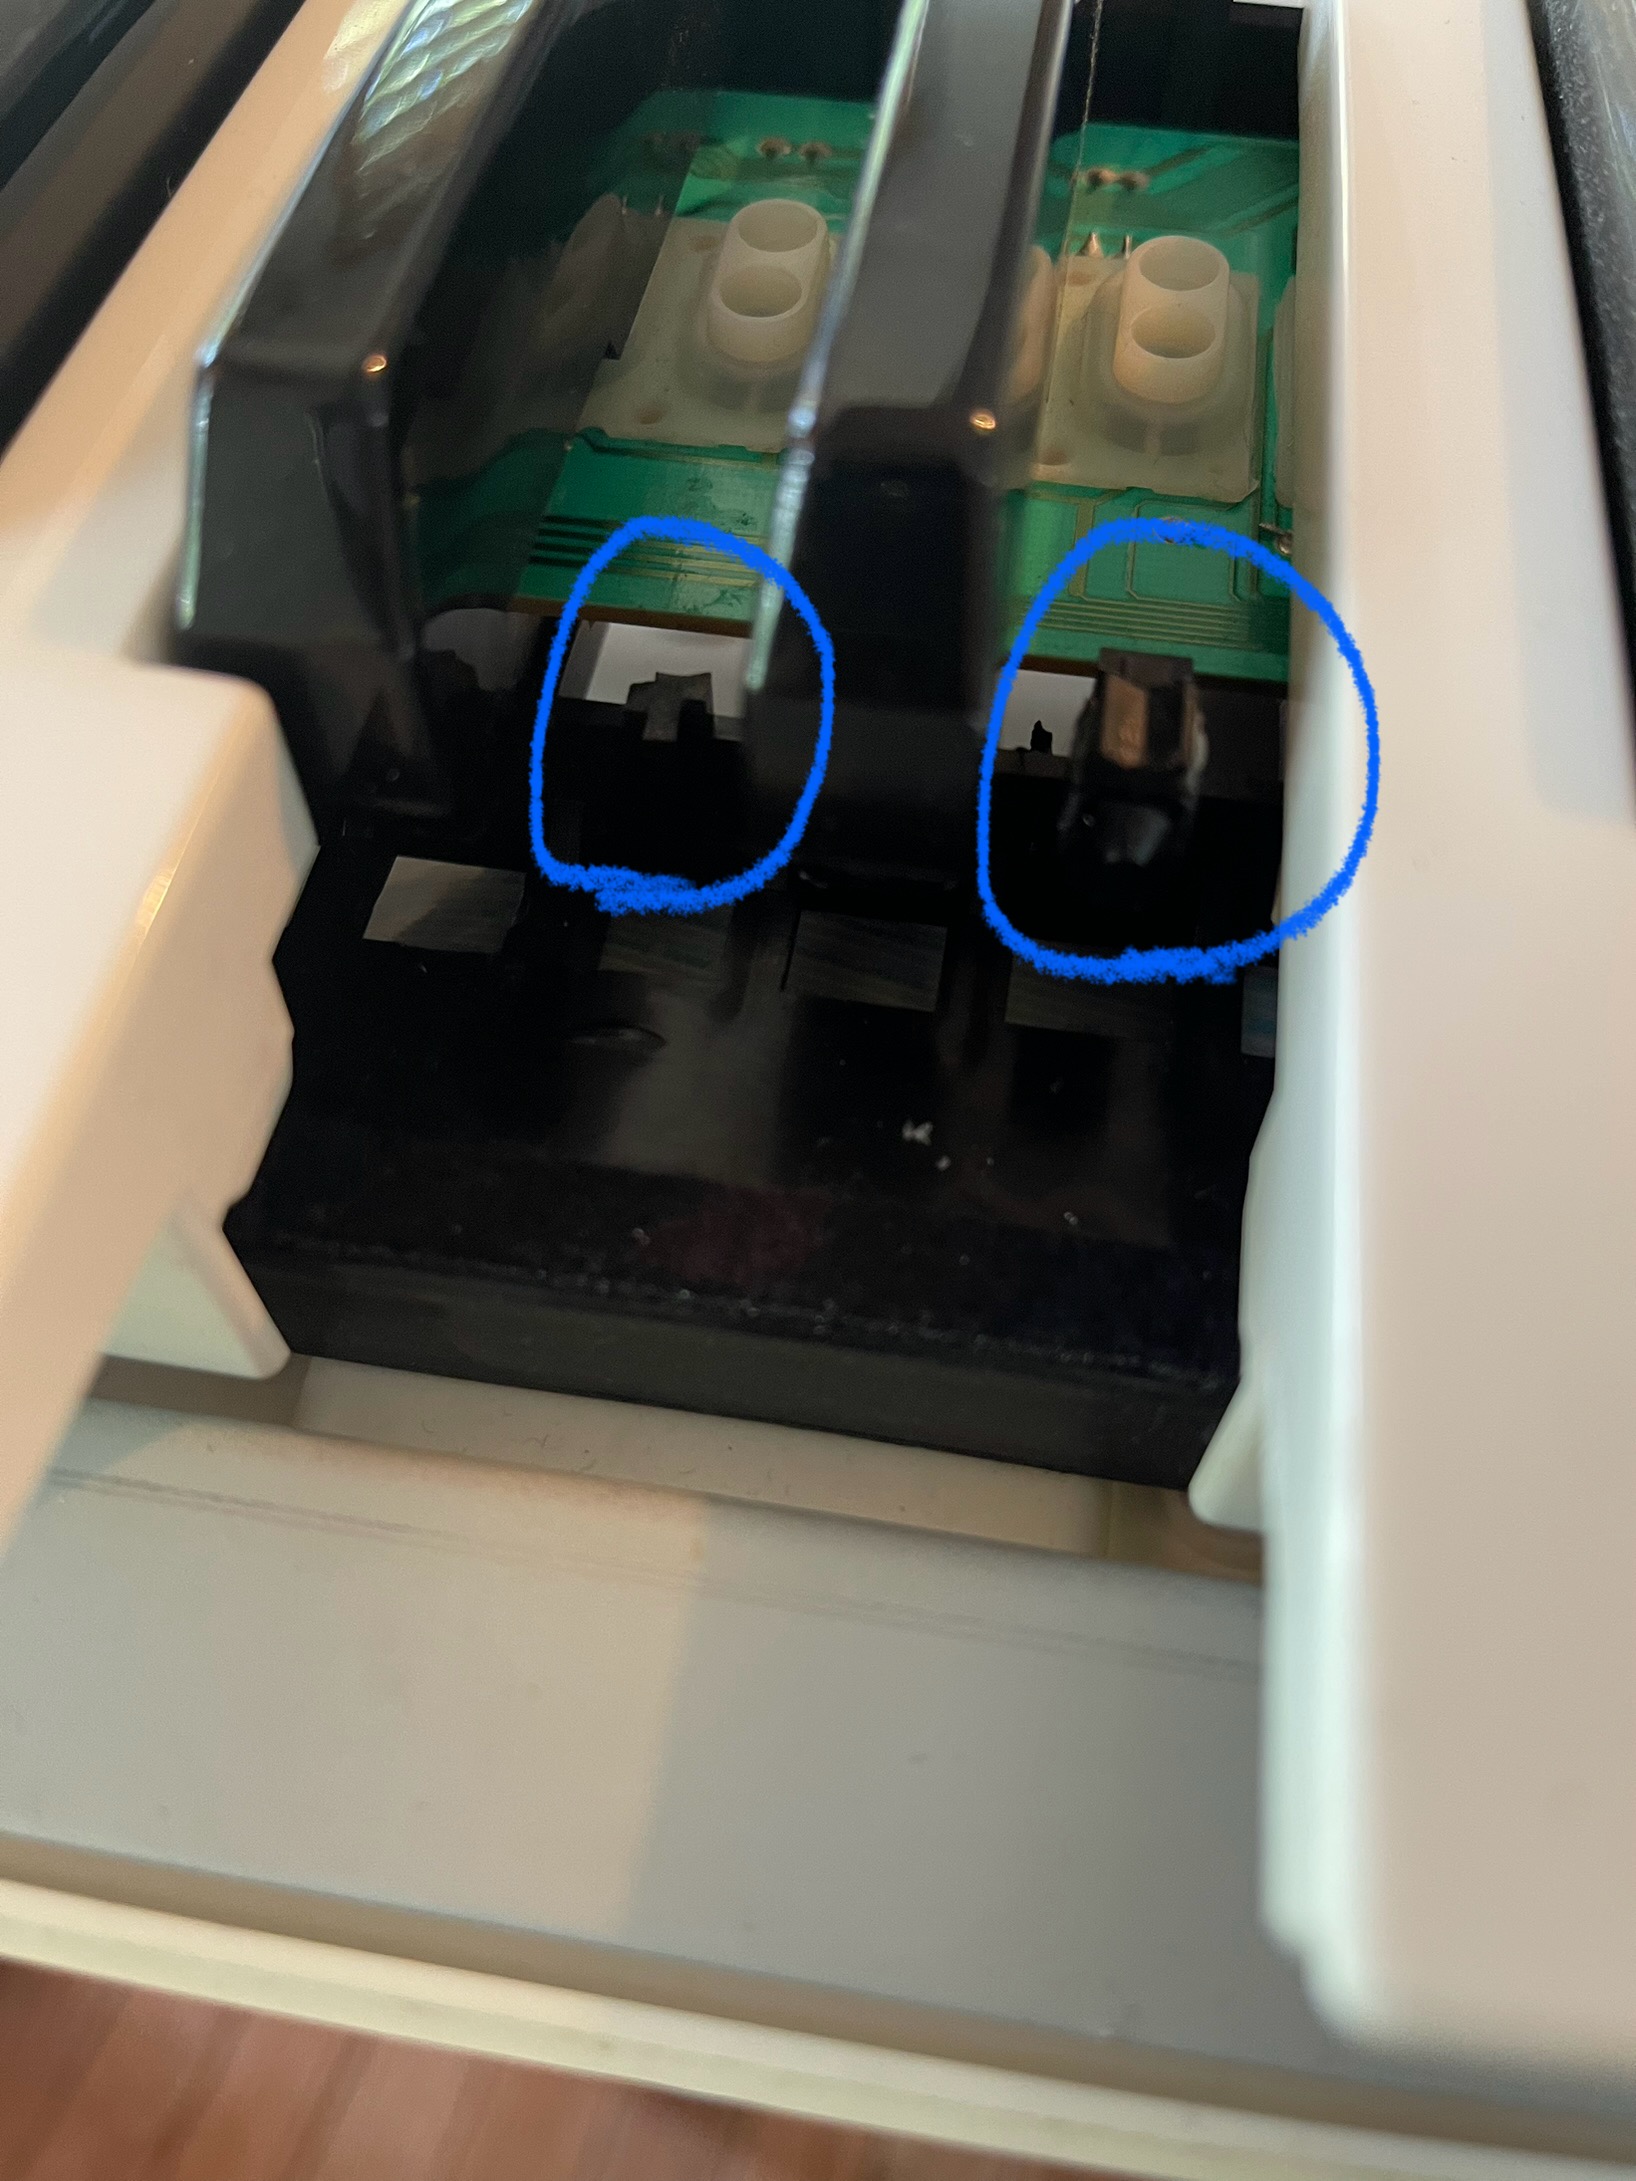
The mounting for these keys is individual - a spring in the back provides for the return, and towards the front of the key is a square bracket under the key that hooks into a plastic piece the stands off of the plastic that runs underneath. This also has a rubber bushing that fits around the piece of plastic on the standoff. Since
the standoff is broken off there is nothing to hold the key from popping way up above the playing surface.
Any hacks out there to get the key to stay put ? Does not look like there is a part for this. /see attached pic - the mount for the bushing is there on the right key but broken off the one on the left.
Do you have the piece that broke off? If you do then you might be able to superglue it back in place. If not then I’m linking a video of some plastic parts repairs completed using superglue and baking soda. I’m not sure if it would work in this scenario but it’s the best lead I’ve got for you. Otherwise using superglue or epoxy to attach a scrap piece of plastic, wood, or metal could work but it needs to be of similar shape and size. You may have to get creative.
Remove the adjacent keys, a total of 9 keys (including black ones, you only need to remove 3 key to the right or left of the broken one) The idea is the free up space so you can put up a straight edge across. Remove the rubber stoper from one of the adjacent keys.
Get a one paper clip, not the small ones, the bigger sturdier ones.3. Cut a straight piece of it and bend it in 90 degrees. about maybe 1/2 inch on one side and 2 inches on the other side.
Using a file, even out the top of the broken area.
Using small drill bit, very carefully drill hole in the center of the broken piece. Do not go all the way thru.
Place the paperclip in the hole and make sure that it fits. The height of it should be in middle of the stopper of the adjacent key (the one without the rubber stopper). Adjust paper clip length as needed, or drill the hole a bit deeper , just don’t go all the way through the black plastic.
Once you have the correct length of the shorter leg of the paper clip, build up the longer length of the paper clip leg so it holds the rubber stoper. I used various sizes of heat shrink, with a heat gun, to get it to where the rubber stopper goes on it. The rubber stopper can travel freely on it, the main thing is to not bulge out on the sides, as this sopper needs to travel freely inside the key rectangular holder. It will make sense once you test it with the key. If it bulges out on the sides, squeeze it with plyers until it forms a rectangular shape. Cut the longer leg piece to where you have about 3/8 in sticking out.
Put all the rubber stoppers back on the keys, and insert the paper clip back in the hole and place a straight edge of something on top of the rubber stoppers. The idea is to measure for height. Get it as perfect as possible, you can do some adjustment later.
Use JB weld putty to secure the paper clip in place. Make sure it is straight and use a good amount to that it form a strong base. Let it cure for 24 hours.
Once cured, you can bend it down, or up, for final adjustment.