Hi, I tried to turn my GEM PRP7 back on after more than two and a half years of inactivity.
After some research, I came across an Italian forum where other PRPs owners were complaining about the same problem.
Some of them have solved by replacing the backup battery.
So I took my PRP7 apart to peek inside.
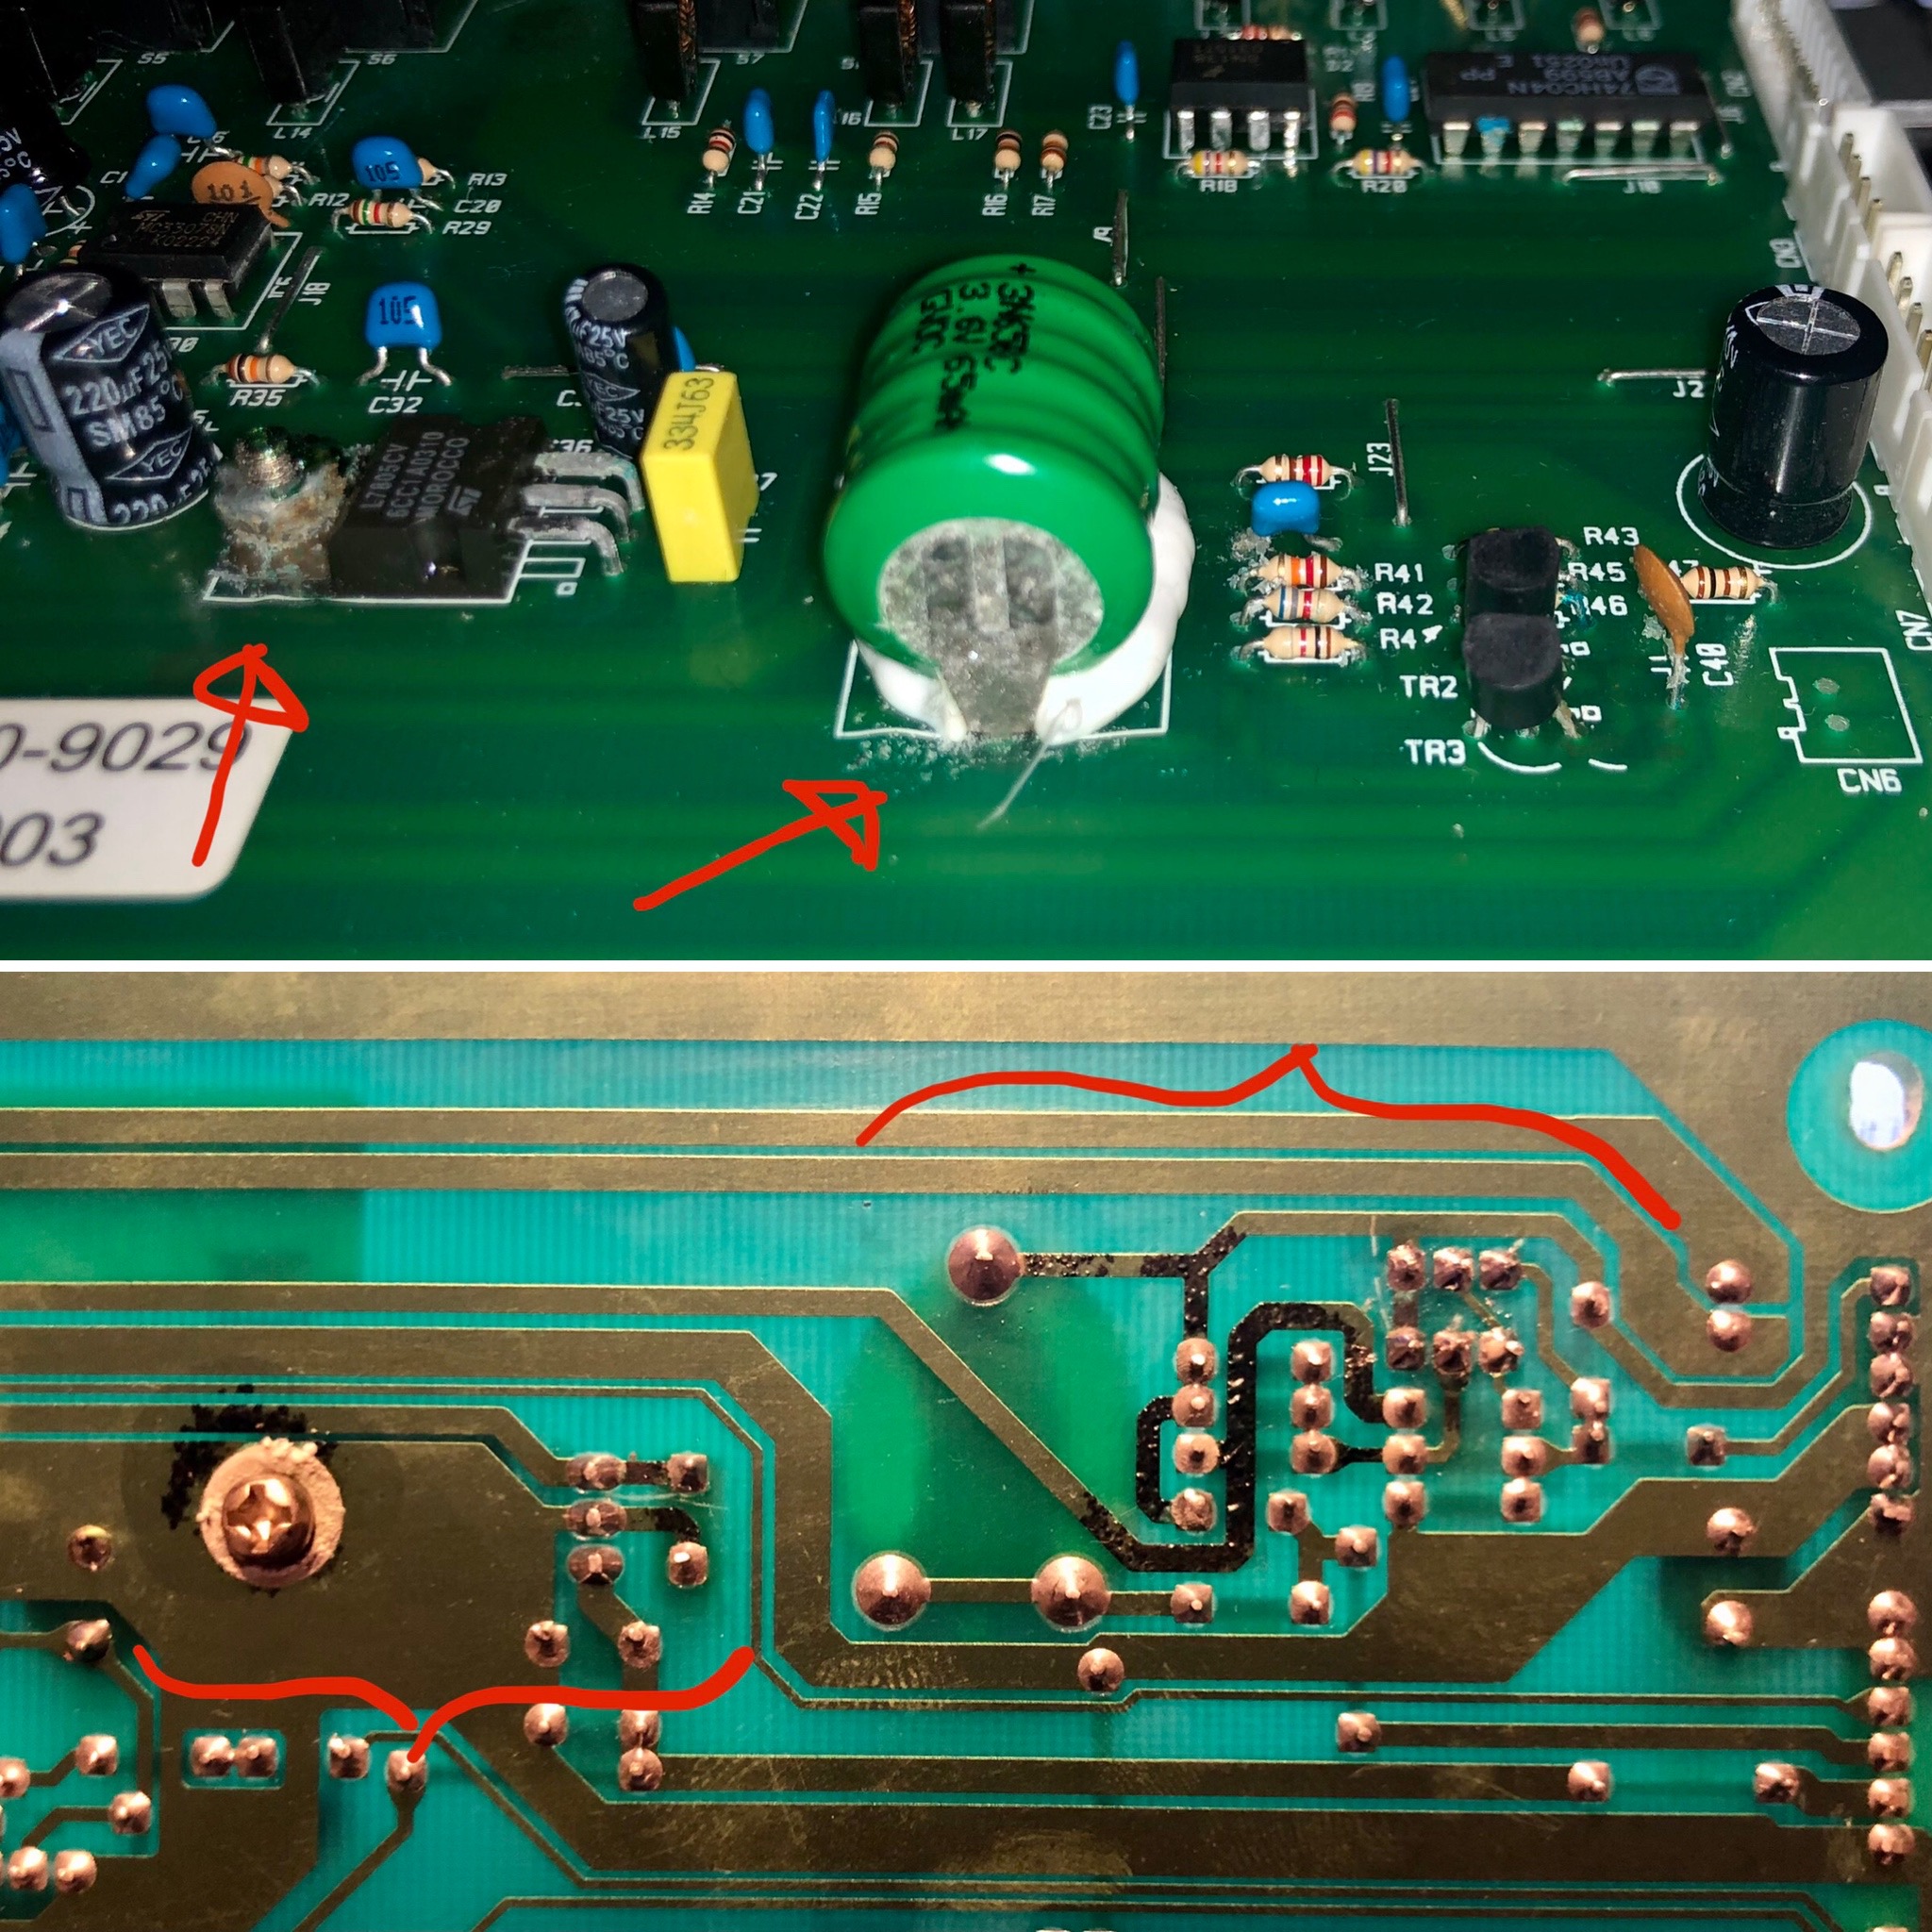
I immediately noticed crystallized acid on the negative pole of the battery, so I decided to replace it.
Handling the PCB, I also noticed that the same type of corrosion is present on the voltage variator and, even worse, on the back of the PCB some tracks would seem burned near the affected areas (battery and variator).
(I attach some photos).
Do you think that replacing the backup battery is sufficient? Or based on your experience can you already tell me if I have to conder the replacement of other components?
Waiting for your reply, I greet you and thank you with esteem.
Hello,
yes you definitely MUST clean the board in a wide range and remove all corrosion from all pcb tracks.
The battery leakage is not acid, but caustic potash solution. It is hygroscopic, which means it attracts humidity from the air, which again means it will never dry and will continue its caustic work on and on unless you really remove it.
- Desolder all parts beginning with the capactor on the left until the cap on the right.
- Then grind down all pcb traces in this area until everything is really shiny copper with no black dots when viewed under a magnifier (at least 4:1 or better).
- Then solder in replacement parts (do NOT use the original parts, the potash solution can creep inside a transistor or resistor and come back afterwards!).
- Then solder all the pcb traces. Use a lot of additional flux when resoldering the pcb traces.
This sounds laborious, but it is the only wy to achieve a reliable state (I learned that the hard way).
1 Like
yhea a lot of corrosion replace the transistor and the battery wipe it down with deoxit d5 with a q tip to clean up the surface on both side. if your doing desoldering get a desoldering wick 2.5 mm of 3 if you can get it it will absorb some of the heat and aid in removing some of the solder and you will feel it absorb some of the heat thru the copper. good luck with the restoration project
1 Like